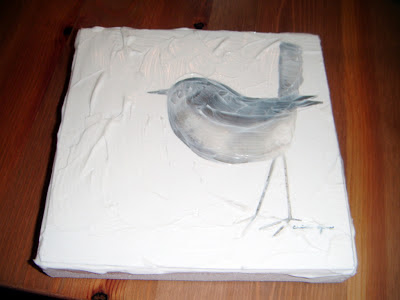
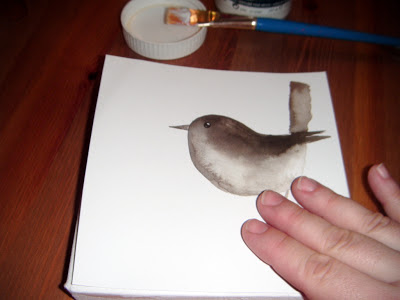
I had the idea to mount the print onto a canvas, and add some texture with some acrylic gel medium. The resulting image changes the look of the art medium from watercolor to acrylic, complete with brush strokes! The best part is that I don't have to drop some money on a frame unless I really want to.
 |
| texturing & mounting supplies |
What you'll need:
- brushes- a wide one and a tiny one
- a canvas the same size as your print, I used this one by Windsor Newton
- acrylic gel medium (I used matte, it also comes in gloss), I used Liquitex matte
- scissors, for trimming if necessary
- your print
The first thing you'll need to do is trim your print to fit the frame. If the print has the same color background as the canvas, being exact isn't completely necessary. If, on the other hand, the print is dark, you may want to either paint the canvas to match the background color or use the canvas as a guide to cut the print to fit. You can also self-mat the print by using a larger canvas than needed, just be sure to use a level and a ruler to make sure that the spaces are level and as equal as you want them to be.
 |
| After my not-so-exact trimming job |
Once my print was trimmed, I set it aside and went about covering the canvas in gel medium. This layer should be thin and even. I used full-strength gel medium (it can be diluted with water up to 25%), because I didn't want the additional water warping the paper.
 |
| The thin and even bottom coat |
Then, I placed the print on top of the canvas, making sure the print was straight. I used my hand to apply gentle pressure to the print, from the bottom corner upward, so that there wouldn't be any air bubbles under it.
No bubbles!
 |
| It is perfectly fine to have gel squooshing out the edges, just as long as the print sticks. |
The great thing about gel medium is that you don't have to wait for the gel to dry before moving onto the next step, which is making sure the edges won't lift. To do this, I put a thick coating of gel along the sides of the print.
 |
| It'll dry clear and the edges will be less noticeable. |
Next, gel medium needs to be generously applied to the whole print.
 |
| I put on a big glob of gel, then spread it around |
Keep in mind that your brush strokes will dry as they are. If you want to have softer brushstrokes, you can dilute the gel with about 15% water. You might want to test it on a piece of the print that you trimmed off (if you did) to see if the paper will warp. If it does warp, reduce the amount of water in the gel until you get a result that doesn't warp the paper.
 |
| Completely covered |
Next, if you want finely-detailed brush strokes, take out your tiny brush and go to town. I used my tiny brush to "paint" feathers onto my bird, and to create texture that highlights the legs and tail. I also swiped it around the outline of the bird's head, back, and belly.
 |
| Don't forget that this will dry clear, and the texture will simply highlight the print |
Once I completed texturing, my bird looked like this:
Put your canvas in a safe place to dry. In my house, this is the top of the chest freezer, where little kidlets cannot get to it.
Once it is dry, pop some hanging hardware on the back, or frame it if you want, and hang it up!
This is what birdie looked like after it dried:
You can see bits of texture from a few feet away, but as you get closer, the texture is more evident.
From the side.
This is what birdie looked like after it dried:
 |
| On my office wall, from about 6 feet (2m) away |
 |
| Just in front of birdie |
From the side.


No comments:
Post a Comment