Thursday, September 4, 2014

Shut the Front Door!

Apparently, curb appeal is the difference that sells nearly half of the homes on the market, according to Zillow.com.  Remember my whining about how my house has seriously started lacking just that?

My front door has been bothering me for about a year now.  It was natural wood.  It disappeared completely in light of the purple+magenta (purgenta?) door on the front porch that is 40 shades of disappointing.  It looked like this:


The plate under the doorknob has rubbed the finish from the door when a screw was loose.  That crack on the bottom right is a seam that bothered me as well.  None of the detail of the door could truly be appreciated.  I took all of the hardware off of the door and set out to paint.

But first... primer!


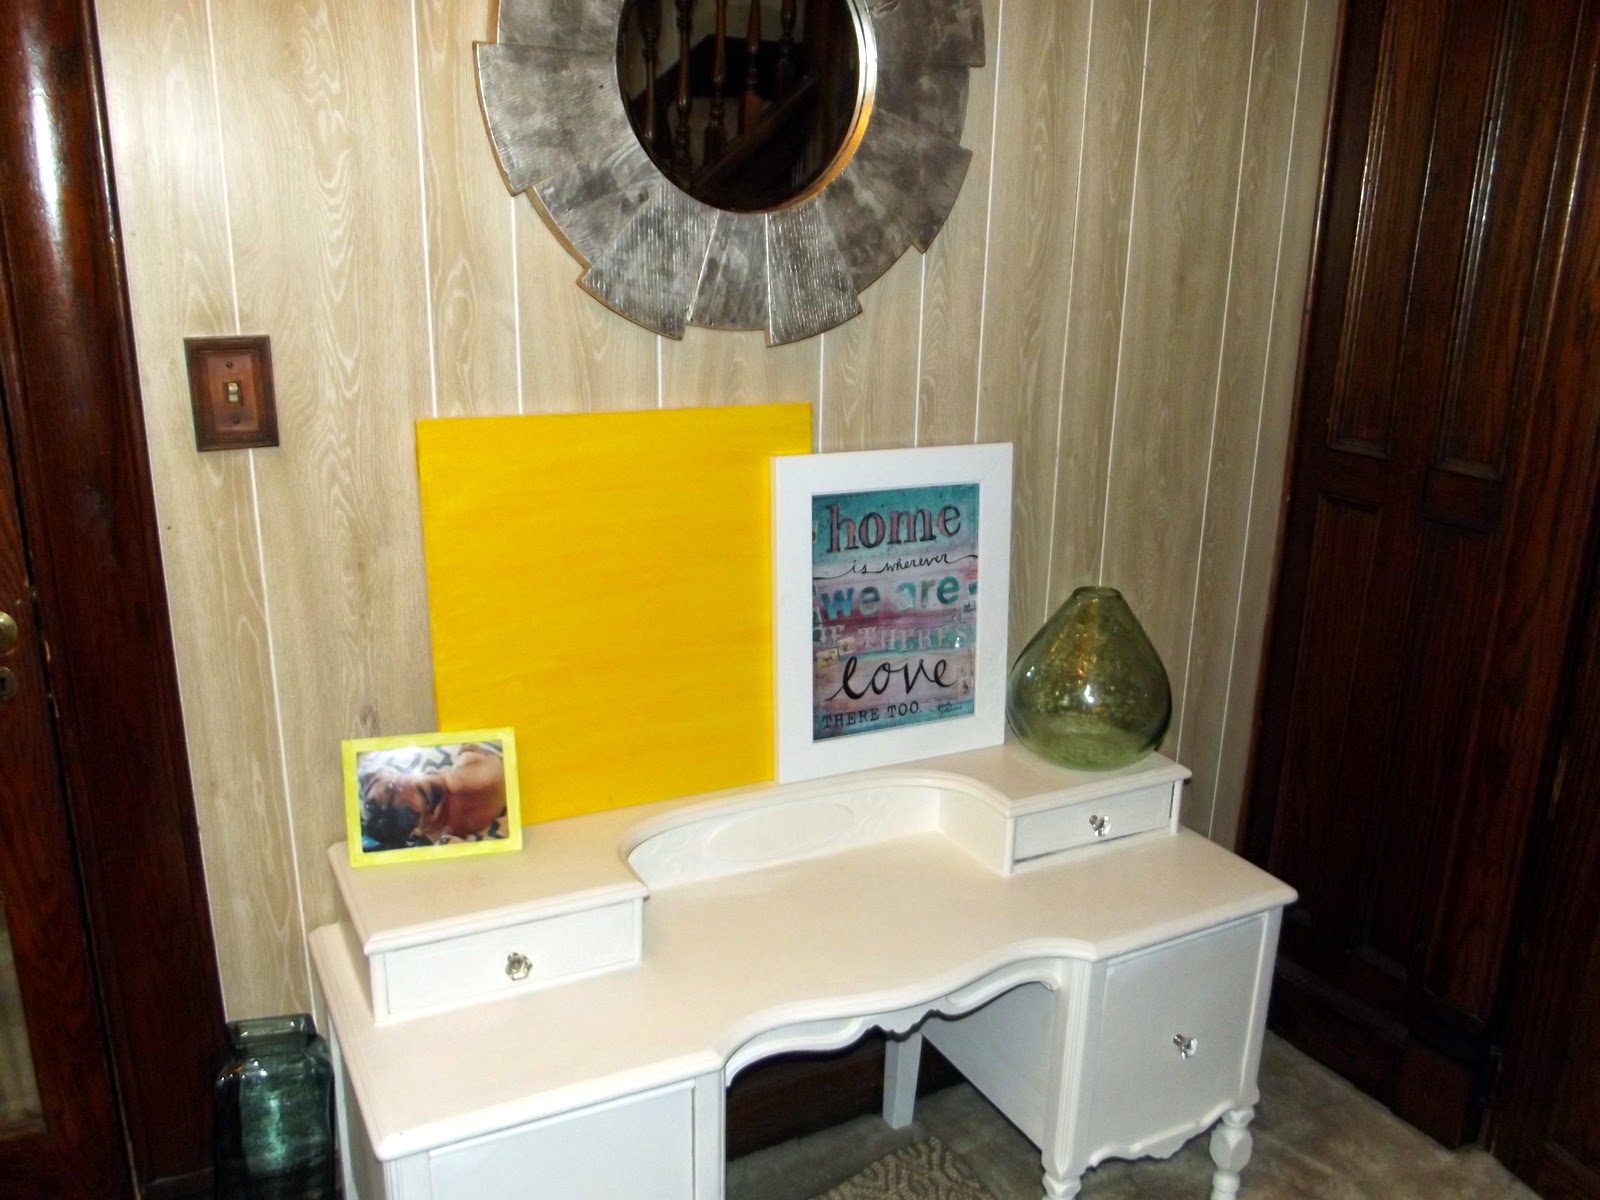
After applying 3 coats of Zinsser Bullseye 3-2-1 primer, the stain in the wood was locked in nicely.  See how the door is a yellow-ivory color compared to the siding? That was after the second coat.

on the floor to the left is a wooden shingle that came off of the house...
and on the right is our "emergency" backpack
I really liked having the front door white.  It completely blended into the siding, but *sigh* I just love how great things look when painted white.  Until I saw the color it was meant to be, that is.

I had a quart of Glidden Peacock Blue mixed in a Behr Paint + Primer high-gloss base, then cut in the first coat.  

I'm only 5 foot 4.. stepladders are all over my house
 The first coat was pretty uneventful, as was the second:


I ended up putting 3 coats of paint on the door over the course of a week to really give it an opportunity to dry well between coats.  I took the hardware off and painted everything, including screw heads, with Rust-Oleum's Universal All Surface Spray Paint in Oil Rubbed Bronze Metallic.  I had taken photos of the entire process, but due to an unforeseen error, they didn't save on my camera's SD card.  I have ordered a new one, but the rest of the photos were taken with my phone, via Instagram.

The rain started and the door seemed to be a bit sticky, so I didn't want to attach the knobs just yet.  I found a burlap wreath pin on Pinterest, saved some change here and there, and picked up supplies to make it using Stone Gable's burlap wreath tutorial.  I found that working with burlap made me sneeze a whole lot (even with allergy medicine!) but it was super easy and cost roughly $15 to make.  Lastly, I applied a very friendly "hello." from PreciousEmma on Etsy.  

This is how it turned out!


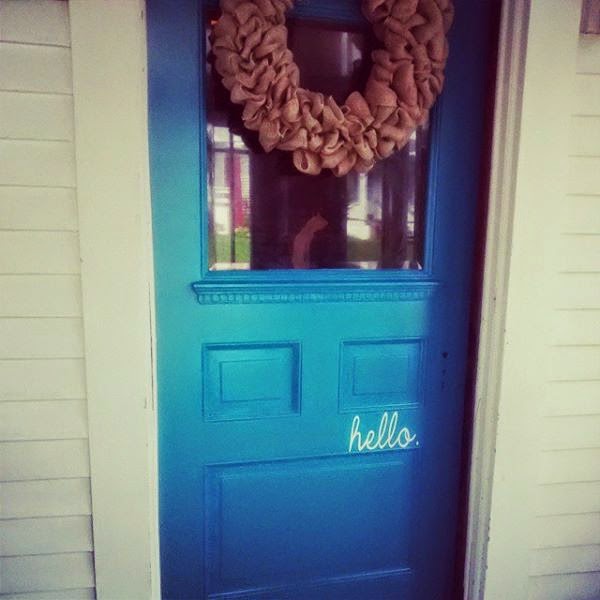
Well, it looked great, but I still wasn't done.  I screwed the hardware back in and started a little Halloween decorating a bit early.  This does have an Instagram filter on it, but this is a good representation of what the door looks like at night (and completely dry).  


I can't tell you how much I love it!  It has definitely upped the curb appeal of the house by instantly transforming the blah wooden door to a friendly, inviting, cozy sort of door.  In Dutch, those feelings are called "gezellig," which connotes a feeling of belonging and welcoming and quaint and, well, an entire cascade of feelings that make you smile.  

Even though winter is coming ("You know nothing, Jon Snow!"), I'm still slowly working on a sleeping porch.  I don't imagine I'll have much more free time this semester to work on it, but my biggest priority for it is finding a screw that will fit the bed frame.  Eventually.  When I can both have my wallet and time to set foot in a hardware store.  I'll leave you with this work in progress, though:

so much painting to do!  
Until we meet again, friends!

*while a lot of brands were mentioned,
I was not compensated or affiliated with
any of them in any way.
I did send PreciousEmma a photo
as an appreciation, and she made it
the photograph to represent her listing
with my permission.

Saturday, August 16, 2014

It's All In How You Mix The Two

A dear friend of mine and I decided long ago that a person should have more than one theme song that covers different aspects of their lives.  There's nothing better than just hanging out with your good friend, not doing anything in particular-- wasting the best kind of time together.  One of our mutual theme songs is Blue and Yellow by The Used.  I thought it appropriate for the styling of the desk in the entry.

Speaking of themes, notice a recurring one?


COLOR!!!  

Since my tuition bill is looming, I have to style the entry on the cheap.  The least expensive way to decorate? Shop in your own house!  I snagged the yellow painting I made ages ago, took the Mae Chevrette print from the front porch, the green glass teardrop vase from my office, and an adorable photo of Lily.  

The whole setup still needed a bit of something.  I thought I had a sparkly silver photo frame tucked away, but it is no where to be found.  I needed a bowl for my keys or pocket change, since I didn't want to tuck it in the drawer.  I like knowing they're where I can see them and one of the kids (Emily!) hasn't wandered off with them.  

Off to the local Goodwill store to see what treasures I could dig up.  Sadly, there wasn't much by way of vases or decorative bits.  I did find a small, pressed glass bowl for a very reasonable 99 cents, so I snagged it.  Later in the week, I had to go to Walmart for garden stakes (the grapes need to be trained on wire) and they were in clearance for $1.50 each.  Right beside them was a glass cylinder vase for 97 cents and a mango-scented candle for $1.50.  Mine!  The last thing I picked up was a bouquet of flowers for $3.97.  

I had enamel craft paint, Frog Tape, and some Krylon Looking Glass (mirror) spray paint already, so it was just a matter of taping off the new vase, painting the outside with the enamel paint, and the inside with the spray paint.  

The hardest part is making sure the tape is even!
I would highly recommend spray painting before putting the enamel on.  I did it in the reverse and needed to wipe it from the outside.  Spray the paint in, and allow the excess to run out onto a drop cloth or (in this case) scrap paper.  I only did one coat of paint, but I think two might be necessary.  I brushed the enamel on, and I really love the texture it gives the finished vase.  

So, putting it all together, the desk looks like this now


I still think I'm far from finished, but this is definitely far more pleasant to look at than the naked "before" photo:


There is still a ton of work to be done in here.  I'm compiling a wish list of things I'd like to get and a to-do list of what needs to be done (like ripping out carpet sometime in the next year).  For now, I'll just have to baby-step it until I can save enough pennies to accomplish what I'd like to do.

I'm going to leave you with a gratuitous pic of Lily, because she has snored through the writing of this entire blog post.  


Friday, August 8, 2014

Naked and Afraid

Remember that side-of-the-road find from last year?  That gorgeous desk whose veneer had definitely seen better days?  It has been finished for quite some time and just hibernating in the dining room.  Today, I finally put it in the entry, where it shall store keys, sunglasses, gloves, winter scarves, mittens, and hats (hey, we have a ton of blustery days here).

The mirror that I revamped when I still lived in Florida has been hung above the desk.  Now the entry area looks like this


It is so... blank.  And beige.  And boring.

The diamond-weave wool rug is there to cover up an ancient floor heating grate.  Without it, the entry is freezing, since there's nothing to stop the cold basement air from chilling the room in the winter, not to mention adding a fortune to my heating bills.  It also evens up the floor surface since the grate is an inch below the carpet.  There is hardwood under the carpet, and exposing and refinishing it is definitely on the to-do list... just not until maybe next year.

For scale, that's a 7-inch tall flower pot, with a 4-inch base.  Yes, that's authentic 1960s paneling on the wall.  I know it is hideous.  The worst part of it is that the ceiling is taller than the original panel, so there's a panel seam that runs around the top of the wall, roughly 6 inches from the ceiling, as if it is trying to masquerade as crown molding.  The same paneling was in the entry closet and one day after moving in, I decided to see what was underneath.  You may want to sit down for this:


Doesn't it just take your breath away?

I simply cannot deal with this visual nightmare all over the room.  Just say no.  I'm thinking this is another gem from the 30s or 40s.  It has also been lined up so that each vignette is roughly a foot away from another one exactly like it.  If the entry walls are anything like the closet, the paneling was applied directly to the plaster.  So, the paneling stays until the entire mess (paneling, wallpaper, plaster, lath) can all be removed and remodeled.  I considered painting the paneling, but that seam drives me crazy... paint would just highlight the seam.

The entry light is a more modern addition to the room.  When I first moved in, the current light replaced a gothic, red stained glass hanging light that was far too small for the room and had a long chain draped from hooks on the ceiling.  The dark switchplate on the wall above the desk echoes the coppery metal of the light, but the design lends itself to the more traditional aspect of the house.  The closet door knob and plate are gorgeous Arts and Crafts pieces that were installed upside down.  Flipping it around doesn't work because the mortise lock is installed in that part of the door.


All of this leaves me to the current issue I'm having with styling this desk.  I need it to be functional and beautiful.  I know there is a lot going on here.  I definitely need color.  The room gets very little natural light, so a shade-loving plant that likes to occasionally be chilly?  A bowl for keys or should I stash them in one of the drawers?  Photos on the desk?  On the wall?  I considered a stack of books, but that would work better if the surface were entirely flat, I think.  There is no electrical outlet here, so a lamp won't work.  Perhaps something that plays up the silver leaf mirror?

HELP!  How would you style this?


Sunday, July 27, 2014

Plants Gone Wild

My friends & I foraged wild ramps in May
Here we are in the heat of summer--sort of.  This last week was the first one in which it didn't rain nearly every single day.

I haven't done a lick of painting at all because it has been far too humid for exterior painting.  If I think about it too much, I start to panic in the likelihood that at some point during winter break, I'm going to be on the front porch freezing my butt off while painting the front door.  I'm grateful that we have an adequate water supply where others in the country are suffering through drought... but I'd settle for a two-week run of 75 degree days with low humidity.

The garden, though, has been LOVING this weather!


Oddly enough, this is the first year out of the past four that I'm going to have tomatoes!  I've lost the rest of them to blossom end rot, but the raised beds drain really well and I haven't had one with it so far!  It has affected the Black Lightning zucchini due to a calcium deficiency, and I'll fix that for next year by adding some lime and crushed oyster shells.  Lime makes calcium more available to the plant, and crushed oyster shells will add calcium to the soil over the long run.  As always, I've been fighting slugs by applying diatomaceous earth after each rainfall.  They've managed to decimate a stand of green beans, but the other patch is just fine.  My strawberries didn't do much this year, but we went strawberry picking and managed to come home with 18 quarts of berries.  Freezer jam has been made.  The rest of them have been crushed and mixed with a tiny bit of sugar to be spooned on top of waffles, scones, pancakes, and biscuits all winter.

There are just about four more weeks left before school starts, and I'm no where near ready for summer to end.

Monday, April 28, 2014

Year One Down


Well, on Friday, I wrapped up finals week and my first year of nursing.  This year has been a whirlwind of early (4 am!) mornings, challenging skills to learn, and far more med cards than I ever thought possible.  I loved every second of it!

Now that break is here, it's time to get stuff done.

Today, I set the seedlings out on the back deck to begin the hardening off process.  We'll still be in danger of frost for another 5 or 6 weeks, but I'm hoping to get some cloches rigged up before then.  The seed potatoes have been sliced into 3-eye chunks and are scabbing over on the deck as well.  This step is important to protect them from simply rotting away in the soil, which has totally happened to me before.  At some point over the early spring/late winter... neighborhood kids cut down my sapling apple trees with steak knives (which I found in my yard).  I'm devastated, to say the least, but the one "stump" has sprouted buds this week.  It will never be a strong tree, but I'm hoping it can be used to either feed bees or pollinate another apple tree.

The fan I was using to circulate air in the dining room seedling central died and I thought I could get by without it... big mistake.  I've lost half of my peppers to damp rot (all of the hot ones).  I've planted more seeds, and the remainder are enjoying a slightly breezy day on the deck.

I also broke the hose... Well, one of the hoses.  It, however, is the hose that reaches the raised beds, so a new hose is also on the list.

There IS good news.  The peas and garlic are up.  The strawberries are doing well.  Hon Tsai Tai, spinach, basil, cilantro, beets, and carrots have all been planted (and some are sprouted).  I finally sanded down the little Moroccan side table I picked up at the antique mall last February.  I have a few options as to how it'll be painted, but I'm leaning toward something that'll look good on the front porch.  I've also figured out how to add my Instagram feed to the blog.  I took the girls to the creek for a photo shoot, and I'm planning on doing something with the results either in the entry or in the dining room.  Haven't decided, but I'm leaning toward the entry.

Oh, I did manage to finalize the front door's new color, and that'll be in the works soon.

It hasn't been ALL work and no play... I finished a book that I had started over winter break.


Saturday, April 19, 2014

And So It Grows

As you may or may not know, I live in the northwest corner of Pennsylvania.  Due to our proximity to the Great Lakes, we have rapid weather changes.  In fact, last week we experienced temperatures as high as 80*F (26C) and as low as 16*F (-8C)... in a 30-hour timeframe.  Due to such fluctuating temperatures, you can imagine how difficult it is to get a garden in place.

Our first average frost-free "safe" day doesn't occur until the very end of May, and our first average killing frost date is mid-September.  It makes for a very short growing season.

So, what's an avid gardener to do?  Start seeds inside!

There are quite a lot of benefits to growing your own plants from seed.  First of all, the sheer abundance of variety trumps anything you can get at a big box store or even at a landscaping center.  You can find varieties that are collected by small mom-and-pop seed companies who are passionate about revitalizing nearly extinct seeds.  You can grow the same melons that Thomas Jefferson grew at Monticello, or tomatoes whose seeds were brought to the U.S. by a singular immigrant nearly 100 years ago.  Much of the produce sold at the grocery stores today have been grown simply for their ability to withstand shipping stress.  When you grow your own vegetables and fruit from seed, you can grow solely for flavor.  Everyone knows a vine-ripened tomato tastes worlds better than anything you can get from the produce aisle in the dead of winter.
 
just one page of lettuces at High Mowing Seeds!
Seed packets have a wealth of growing information on the back

I've waxed poetic about my favorite seed companies before.  I like to stick to small companies that have a commitment to selling seeds that aren't genetically engineered or genetically modified, who sign the Safe Seed Pledge, and who refrain from doing business with Big Ag giants like Monsanto, Archer Daniels Midland, Seminis (now a subsidiary of Monsanto), or ConAgra.  That said, I love the folks at High Mowing Seeds, Filaree Garlic Farm, and Baker Creek Heirloom Seeds.  I've been ordering from these three companies for a few years, and I've had consistently excellent germination results... not to mention that their customer service is truly excellent.

Just some seeds I'm growing this year... purple carrots, anyone?
If you have never started seeds before, I would advise you start small.  Get a couple of varieties that are suited for your growing zone and grow something that is easy that you really like.  If you like green beans, I would highly suggest starting out with those.  They are nearly foolproof, yield beans all summer, and can be grown outdoors or in a container on a sunny balcony.  You can up the ante with cherry tomatoes and zucchini.  Easy, prolific, and delicious!  Heat-loving plants like peppers and melons are a bit more finicky, and require higher temperatures to germinate (or sprout).  If you do grow them, you might benefit from investing in a heat mat specifically designed for growing seeds.  Lastly, seedlings need about 16 hours of sunlight daily, and I solve this issue with a couple of shop lights that I picked up from Home Depot for about $15 each.  Plant light bulbs run about the same price, so for about $30 you can start enough seeds to fill your garden.  My current light bulbs have been going strong for 3 years now, so it really is an investment that'll pay off in the long run.

Here are some of my "babies" that have just sprouted:

A cabbage plant (purple rim) that Evie brought home from school mixed in with New England Pie pumpkins and Obus melon

Toma Verde tomatillos, H-19 Little Leaf Cucumber, Crimson Sprinter tomatoes

All Red and German Butterball potatoes

King of the North sweet bell pepper, Magnum Orange habanero, Ring O Fire cayenne, Little Tam Jalapeno peppers

Nutterbutter winter squash and Baby Blue Hubbard winter squash

Heritage and Latham raspberry canes (didn't start these from seed)

Amish Paste tomatoes

As you can see, you can use just about anything to start seeds in.  I have peat pots, yogurt containers, and half-gallon milk containers.  I do buy an organic seed starting soil mix to start seeds in, and as they grow, I fertilize them lightly with a tiny bit of Neptune's Harvest organic fertilizer that I just mix with water and add to a spray bottle.  For pest control (like the fungus gnats that killed last year's strawberry plants), I use sticky traps.  Sticky traps are SUPER sticky, so you want to make sure not to touch the sticky part, and keep it away from kids and pets.

In other news, it is finally finals week.  Six more days before I can start working on the house again!

Disclaimer:  I am in no way affiliated with any of the seed companies mentioned here... I just love them.  While I do have an Amazon storefront, none of the links provided are affiliated with the 1868Pleasant Amazon Store.  

Wednesday, April 16, 2014

Curb Uh... Peel

It is no secret (to my neighborhood at least) that the front of my house has definitely seen better days.  While the main exterior of the house is a solid tan, the front steps have been painted brown, seemingly to match the... dirt?  Maybe so as not to clash with the yellowish brick that is the sidewalk.  Or... something.  The entry to the front porch is painted burgundy (really, that's all the paint can says:  "burgundy") but it is definitely a bright, purple/magenta version of burgundy.  Perhaps "faded wine stain burgundy" would've been a more accurate name, but I don't name these things.  When you get into the front porch, you're accosted by the sea green hue of the wainscoting.  Here's what we're dealing with:

The door to the entry lost some screws, and the metal has rubbed at the front door

This door has seen better days.  It looks so sad.

The hardware has been changed too many times, and not replaced in some spots.
Paint chips anyone?

Ick.

Magenta!  I love the door handle here, but it's just decorative at this point

Interior porch.  The rain hits this side of the porch all the time, and the paint has peeled away

bottom of the windows where the caulk has flaked off


None of it looks good.  I've hated it all since I purchased the house, but so many other things needed to be done that this item of business has been lingering at the bottom of the list for a few years.  Until now: The serious lack of curb appeal is highlighted by peeling paint, cracked and missing caulk around the windows, and just plain hideousness.  It looks about as bad as it can possibly be, in my opinion.

This summer's project is to bring sexy back to the front of my house.  I present the following to-do list:

  • Paint!  (and of course, the prep that goes along with painting)  I can't currently afford to paint the entire exterior (so, the solid tan stays, even though that is peeling slightly) but I can get rid of the burgundy/sea green/brown tragedy that is the color scheme of the front porch.
  • Caulk the windows and repair screens where needed.
  • Remove the dead foliage growth from last year, and apply organic weed control, barrier, and mulching.  Sadly, this means all flowers and flowering plants will have to go until the very invasive moonflower and bishop's weed dies off completely... which will likely take a couple of years.  
  • Repair or replace door hardware.  While they're old, they're temperamental.  One slight depression of a button means that the front door locks... and I don't have a skeleton key to open it.  I'm not going to mention just how I open it, but it takes at least 15 minutes to MacGyver.
  • Remove and replace the rotting wood retaining wall and replace with landscaping bricks. 
  • Remove tile house numbers and replace with something modern.
  • If I can swing it financially, replace the exterior lights on either side of the front door.
  • Transform front porch into proper sleeping porch.

I still have a week and a half of classes, but as soon as that is over, it's time to start scraping, sanding, and priming.

Tuesday, January 21, 2014

I really, really want it to be spring.

Is anyone else in a funk?  Tired of freezing your hind end off and not a lick of green to be found?

I'm right there with you.

A couple of weeks ago, we had temperatures plunge into the well-below-zero region and the water supply line to my washing machine froze.  I ran to Home Depot and picked up a heating cable and some insulation tubes in order to remedy that situation.  Of course, I forgot the heat-safe tape, so by the time I got everything installed we had a 40-degree day and the pipes thawed on their own.  A major lesson I learned in this case was to open the heating cable instructions in the parking lot (after I made my purchase) to find out if I had all of the components necessary to install the cable in the first place.  I also kept the faucets open at a trickle, and kept the washer on so that when things did thaw, there wouldn't be a buildup in pressure.

I did get outside on that 40 degree day to plant garlic in my frozen raised beds.  I simply laid garlic cloves on the frozen soil and covered it with about 4 inches of topsoil that I stocked up on at the end of summer.
German Butterball & Rose Finn Apple fingerlings
I placed my order of organic seed potatoes from High Mowing Seeds already, and those will arrive in April sometime.  I'm sticking with the All Red and German Butterball that I planted last year.  I didn't get a good harvest from the All Red, but that was due to a lot of rain and not enough sun.  I'm skipping the fingerlings this year for the simple fact that they're a bit out of my price range and we didn't get a high yield from them last year.

I'm pretty happy with the fact that my Brown Turkey fig has suddenly gone wild and is sprouting leaves like mad.  I brought it in before our last frost and all of its leaves promptly fell off.  It didn't look like it was going to make it.  I added some azomite and greensand to the soil, watered it a couple of times and left it under the grow lights.  Apparently, that did the trick and I'm hoping to maybe have a figlet at some point.  Fingers crossed.

Next month will usher in seed starting on a larger scale, most notably getting the onion seeds sprouted and I'm going to try my hand at growing them inside, in a container like this:
from Auntie Dogma's Garden Spot
That is pretty fricking amazing if I do say so myself.